Wednesday, September 28, 2011

A Shaker Card for a Princess

We know a little princess who is the apple of her parents' eyes so I designed this card for her. Since I haven't made a shaker card in ages, I thought I should improve my method for this favorite card making technique. I wanted to make the shaker part separate from the card so that several could be made to be attached to projects later. The Sizzix ornate frame shape appealed to me but it did not cut the thicker foam easily. I decided to cut two thin foam frames and tape them together with the thinnest Merikan tape. I matched the foam color to my cardstock and cut out a cardstock frame. Next I taped the cardstock frame to some acetate (recycled from packaging) and trimmed around the acetate. I taped the double foam frame to a printed paper by Autumn Leaves and trimmed off the excess paper. Before filling the frame with beads you should dust the inside with cornstarch to prevent them sticking where you don't want them to (I forgot to do this). After filling the frame (I used Martha Stewart mini beads), I taped on the acetate cover. Using Merikan tape allows you to position the pieces before completely removing the tape liner. Even if your frames are slightly off alignment, because the frames are all the same color it doesn't show. I do not recommend using glue because of the risk of smudges on the acetate. The little girl image is a Copic colored CC stamp (Sugar Plums Cherry Emma), and the embellishments used on the frame are from K and Co. The lacey white border strip was made with a Martha Stewart border punch. The striped ribbon is an American Crafts product. The tiny tags hanging from the cherry Doodle Bug Designer brad (with MS string) are from K and Co. The cherry print paper is also from Doodle Bug Designer. Once you have all your stuff out, it's easy to cut lots of frames and get them prepped for assembly. I love it when I find a stash of pre-cut pieces that make my next project a breeze. Thanks for stopping by. Please leave a comment if you can. It really makes me happy to hear from you.

Sunday, September 25, 2011

It's a pin. It's a necklace.

It's both! The brown fluffy flower is a pin made from the Laliberi kit I showed you in an earlier post. I added a feather (from the Ben Franklin Crafts kid craft section) that came in a bag of similar long, elegant, natural-looking feathers. There were many feathers and colors to choose from at the store so you can easily coordinate them to your project. I used Fabri-Tac glue and sewing to form the flower (even though the instructions said to use a hot glue gun). Anyway, I attached a pin back to the feathered flower and plan to wear it that way sometimes. However, I've been feeling the fall season (even though we don't really have autumn color changes in Hawaii) and thought that I needed to design some fall accessories. It was a simple two-hour project involving a strand of faux pearls, a 24" length of Vintaj chain, and an 8" strand of glass, seed, and brass beads from BFC. With jump rings, I attached the chain to a two-strand clasp and attached the 8" strand (restrung on beading wire) to the middle of the chain using crimp beads and crimp covers. The pearls were also restrung on beading wire (slightly shorter than the chain) and attached to the clasp with crimps and crimp covers. The necklace can be worn alone or fancied up with the feathered flower pin. You don't need to change your whole wardrobe for the fall season. Simply adding some autumn inspired accessories will go a long way to stretch your clothing budget. Check out our Bead Shoppe in Ben Franklin Crafts for more great ideas and I hope you'll stop here again......soon!

Thursday, September 22, 2011

The Finished Moving Card

A couple of posts ago I gave the instructions and measurements for making my moving card. I decided to make a card from the card base used in the tutorial. Since I had just purchased the Sister Stamps (#2) from Ben Franklin Crafts, I decided they would go perfectly with the Asian-looking Bo Bunny double-sided paper. After deciding which image should face which way (and because this card was going to a family with a son and daughter) I chose Nobu from set 2 and Kiyomi from set 1. To the card base I added some crinkled washi paper (just wrinkle your own scrap if you don't have washi paper), printed origami paper (from a pack found at Ben Franklin Crafts), stamped words (Hero Arts), and ribbon (from a large BFC roll labeled 'retro' sold in the gift wrapping dept.). I colored the SS imjages with Copic pens (from BFC). The butterfly from the Kiyomi stamp set was used inside the card and is what Nobu seems to be chasing. The atennaes on the butterfly image were cut off (too difficult to cut out) and replaced with stamen from the floral dept. in Ben Frankln Crafts. Becasue Nobu's arms were wide enough to hide the moving tab, it was easy to attach him and makes him seem to extend across the width of the card. I hope this card inspires you to try making a moving card. It's fun and not difficult. Thanks for visiting this site. Please check back again to see more of my ideas.


Monday, September 19, 2011

Laliberi and MS Products

I know I already showed you the Laliberi products for jewelry making but the following week I found out that the same line has these fantastic kits and parts for ribbon flower pins and hair accessories. These items were near the ribbons in the paper craft area of the Hilo Ben Franklin Crafts. (I think they should have been with the other Laliberi products in the jewelry department or perhaps in the ribbon aisle but perhaps space was at a premium due to the holiday season.) In any case, I think the kits would make fantastic gifts for your crafty friends or you could make the items using ribbons you already own and the findings sold separately. I plan to combine the ribbon rosettes with the Laliberi supplies to make jewelry pieces I've seen at high-end boutique stores. I don't think these are new but I just never looked at them closely before. (bottom photo) These are some Martha Stewart products which I feel never go out of style. As I showed you in a previous post the package of 12 strawberry/flower corded tag embellishments are just too cute to pass up and will be useful on many gift tags. I love the set of teardrop shaped ink pads. The color selection is pleasing and they fit together in a clever space-saving way. We all use label stamps for paper crafting and the MS set is uniquely designed to have six individual clear stamp designs that can be stamped inside each other... so useful. As you all know I can never resist flower embellishments especially pink ones, so I picked up the MS tiny flower buttons (perfect for the center of other flowers), fluffy pom-pom flower stickers, and some crocheted ones which will pair well with the larger Prima ones. When you have the time to leisurely shop Ben Franklin Crafts, I think you will be surprised by the number of really cute, reasonably-priced craft items you will discover. It's great to have a stash of products which make it a snap to whip up a card/gift for any occasion. Thanks for being a reader of my blog. I appreciate your readership and encouraging comments. See you soon!


Friday, September 16, 2011

Halloween Candy Matchboxes

I finally decided to get going on my Halloween candy matchboxes and I couldn't find the paper or embellishments I just bought so I had to resort to using some stuff I had leftover from last year. I used the matchbox Big Pro die which cuts out a matchbox large enough to hold an ample amount of candy. Each box took half of a 12x12 sheet of cardstock and one 8-1/2"x11" sheet of acetate (the Xerox kind used for projection overlays). I got the idea to cut acetate with a Sizzix die from one of Cheryl's (Life is Sweet) projects. The acetate I used was a little hard to crease even on the foam pad, but cut nicely on the Big Pro acrylic sheet. Two methods that I used for creasing were 1) measure and crease by hand and 2) place cut acetate over die and follow crease lines with a bone folder. I prefer the thicker acetate because it looks more professional like store bought candy boxes. I put Merikan double stick tape on the small inner flap of the printed box to secure it and along the edge of the acetate to form the sleeve. It was fun to coordinate the embellishments with the cardstock. I especially like the eyeball ribbon and the metal buttons with pin backs (from Ben Franklin Crafts) which can be worn by the recipient of your candy box. I think I will fill the boxes with homemade fudge slices. Since these are matchboxes, the sides are not sealed which is why I tied the ribbons to hold the boxes closed. For sanitary reasons you should put wrapped candy in the boxes. Of course, once I finished the matchboxes, I found my this year's Halloween purchases. I just cleaned my craftroom.....really! LOL!


Tuesday, September 13, 2011

Instructions for the Moving Birthday Card

On the 4th of this month I had a post about a moving birthday card (the godzilla/robot one). Here are the measurments, instructions, and photos so you can try to make a moving card too. You need to start with a double-sided 12x12 card stock. The diagrams are not drawn to scale so you will have to measure. Once you make a template you can just trace it rather than measure everytime you want to make this card. The diagrams are in a jpeg file so just click on them to print out a copy.


The next two photos show the pieces cut out of the cardstock.


Fold the pieces as shown and insert the tab into the opening on side one.


Tape the two pieces together(with Merikan double stick tape) on the left side as shown in the photo. The image that you want to move from left to right in the card should be attached to the tab. (Cut the tab if it is too long for your image.) After you finish the card and are satisfied with the movement, tape the top and bottom of the card so that the card will not come apart being careful not to tape the moving parts.


The following are other views of the card.


I hope that you are successfully able to complete a moving card using my rather crude drawings, vague instructions, and unprofessional photos. Is it obvious why I don't do tutorials? LOL!

Saturday, September 10, 2011

Try Something New

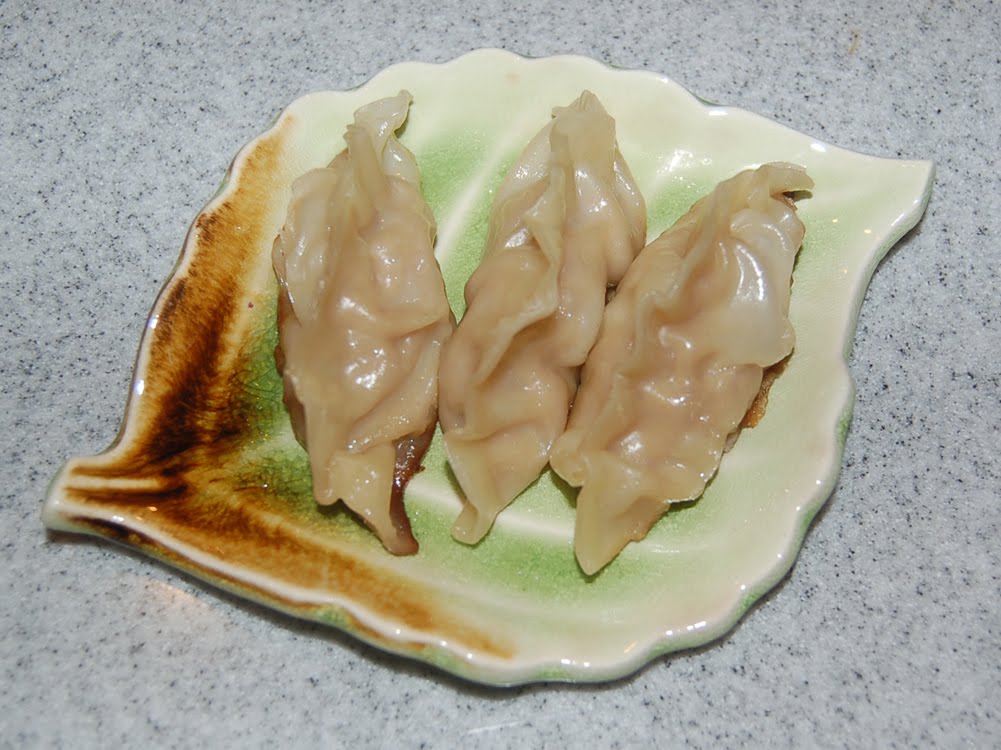
I often get in a rut even about the foods I prepare. To get out of the boring and into something I love to eat, I decided to try making shu mai.....pork stuffed won ton wrappers. I'm not sure if won ton wrappers are the same as gyoza wrappers but I think won ton wrappers are square and gyoza wrappers are round. I used the round ones that can be found in most local markets in the refrigerated area. Don't these look delicious even though they are raw? Okay they are not too pretty but it was my first try. LOL! One tip I learned by trial and error is when the instructions say to wet the outside edge of the wrapper with water I think that it meant the side that the filling was not going to be in so that when you curl the wrapper around the pork filling it will stick to itself. I think the bamboo steamer is the best way to go because you can stack several at a time. Recipes for the filling can be found in many local cookbooks but basically it has ground pork, an egg, oyster sauce, and green onions. I would add chopped water chestnuts and mushrooms but that is my taste preference. The original recipe had raw fish cake but I tried it and it is too fishy smelling for me. Here they are......my first homemade shu mai! Aren't they delicious looking on a pretty plate.....presentation is everything especially in cooking.


The bottom photo shows what I did with the leftovers that wouldn't fit in the steamer....I made pot stickers (the recipe was on the package of gyoza wrappers). I think I would prefer fried gyoza because the texture would be different from the shu mai. All in all I was very impressed with my new cooking adventure and I have a week's worth of shu mai to enjoy! Go you crafty person.....try something new......get out of your everyday saftety zone! Yes, you can!