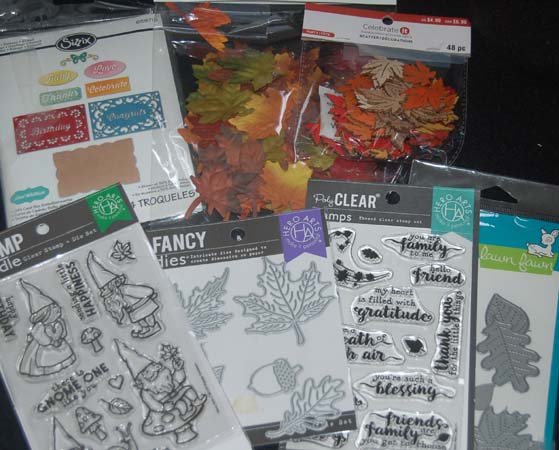
Wednesday, October 2, 2024

Autumn Leaf Papered Box


On a recent trip to the east coast, I spied some autumn oak leaves that were just starting to change color.
They were so pretty that I had to collect and press them.  I knew that I would find some use for the multi-colored autumn leaves.  Once at home I decided to use them to decorate a few boxes.  Beginning with a sturdy L'Occtaine box, I covered it with a fibrous beige washi paper. This was easily done by laying the top of the box onto the washi paper and cutting around it leaving a margin of paper large enough to wrap around the box top sides.  Next glue (Fabri-Tac) was applied evenly to the top surface of the box and the paper was pressed onto it.  The sides of the box lid were then covered with glue and the paper pressed down so that there were four wings on the corners.  These wings were then trimmed closely to the box top corners.  The same thing was done to cover the box bottom.

I decided that I wanted to waterproof my box so I applied 1 minute UV-LED resin to both the top and bottom of the box. I did a little of the box at a time using a small LED light to cure the resin. (Both the resin and light are available at HM BFC).  The resulting box was waterproof but shiny and the washi paper became translucent so that the outer surface of the box became quite yellow.  To correct the look of the box, I decided to try spraying on a Krylon matte finish.  It worked!  The box is now more natural looking (matching the leaf and washi paper).  The box is still yellow so next time I make an autumn leaf box I will use a white or beige box.  Also I will skip applying the resin and just spray the papered box with the matte finish.  So what am I going to do with my autumn leaf box?  Well, of course I will use this one to house the acorns gathered with the leaves. Other leaf boxes will probably be used for gift giving. Next, I have a plan to convert the acorns into jewelry! I love Autumn! 


Saturday, September 28, 2024

Halloween Ghost Card


Even before I knew that my grandson was going to dress up as a ghost this Halloween, I purchased the Whimsy Ghostly Greetings 4-1/2 x 5-1/2 stamp background, the Whimsy Grunge Ghosts Quick Card Fronts, and Whimsy Scary Night Word Die Set. To begin the cards, I stamped the Ghostly background using the Versa Mark Dazzle ink onto each card front.    


Next I sprinkled on Ranger Holographic embossing powder before heating the cards with a heat gun.  The result is a barely visible but somewhat spooky holographic image over the ghost and pumpkin scenes.

I hand drew in the eyes for the single ghost because for some unknown reason he was missing some.  In the pack fronts were two cards of Halloween greetings which I cut apart and affixed the words to my cards.  The decorated card fronts were then attached with double stick adhesive to kraft paper brown card blanks.


Inside the cards, I attached with glue the words cut from black card stock.  Over the words I flicked on some opalescent white ink. These cards were super easy to make and hopefully they will add to the spooky delight of Halloween for the recipients. Happy Hallooooweeen!!!!


Tuesday, September 24, 2024

Tokidoki Decorated Recycled Container


I was extremely excited when I discovered a giant pack of Tokidoki origami paper.  The sheets inside the pad of 250 pieces were multi-colored, pastel and black/white.  I just KNEW that I could use the papers for more than just folded cranes, boxes, etc.  I decided to cover a saved cardboard cookie cylindrical container (with a metal lid and bottom) with the Tokidoki paper and UV light resin.


I used Fabri-Tac glue to adhere the colorful patterned paper to the outside of the container.  Because the sheets were smaller than the whole surface of the cylinder, I had to piece them together.  The colorful and busy design of the paper made it unnecessary to worry about the designs not matching up.  For the top knob of the container, I used one sheet of paper to fold an origami ball shape (similar in construction to the crane so it was not too hard for me). This origami ball was glued to the recessed cover of the container. Using my finger as an applicator, I spread the 1-minute curing LED UV resin (available at HM Ben Franklin Crafts) over the top of the ball. I gradually spread the resin and cured it in sections over the paper ball. I also poured some resin and cured it in the well of the cover.

Next, I spread more resin (with my clever finger applicator) over sections of the papered container and cured it with the UV light ( purchased from HM Ben Franklin Crafts).  (The small light is very portable, lightweight  and has an automatic 1 minute shut off.)  I think this project turned out amazingly well and will be an attractive, colorful, reusable receptacle for goodies/small gifts.  I have plans for making other origami Tokidoki resin crafts.  Small folded boxes or tiny dishes can be easily coated with resin to become waterproof.  I think resin coated Tokidoki origami folded animals would be delightful as key chain charms or jewelry.  Just think of the possibilities of what you can create with these simple supplies.  Give your creativity a boost and have fun making something unique!


Friday, September 20, 2024

Autumn Gnome Gift Bags


Since I still had two more Hawaiian Airlines snack bags, I decided that they would make wonderful autumn gift bags because of their rustic color and woven handles.  It was easy to die cut a moon with a small circle die and then stamp on a sentiment.  I rubbed some brown ink along the edges of the moon to highlight the texture of the card stock. Originally, I planned to use some gnome stickers from my stash but they were MIA so I ended up using my Hero Arts gnome stamps.  Simple Copic pen coloring and fussy cutting resulted in some adorable gnomes to position upon some colorful autumn leaves purchased from HM Ben Franklin Crafts.  Every year the store has a nice assortment of autumnal items so I'm sure you can find just what you want.


This bag is similar to the first one except for the leaves which are real stained, laser cut wood pieces.  Although not as colorful as the ones on the first bag, these leaves do add a lovely woodsy texture.

Since the backs of the bags also had  logos that needed to be covered up, I used my oval die  to cut out a piece of textured card stock to make a label.  Some Autumn sayings from a Hero Arts stamp set were used and the bags were done.  I plan to use these bags to spread some Autumnal joy by filling them with homemade edibles. Making Autumn goodie bags will brighten up your day and bring happiness to the recipients. YUMMY!


Monday, September 16, 2024

Quick 15 Minute Decorated Gift Bags

Oh, what to do with those too-good-to-throw-away Hawaiian Airlines meal bags that you get on longer flights.  I decided to turn them into gift bags because I know that with the holiday season coming up I will need lots of hostess gifts to show my appreciation to friends and family.  I didn't want to spend a lot of time and money on the bags because most likely they will be thrown away....maybe passed on to someone else.  HM Ben Franklin Crafts usually has a good selection of die cut images that are stickers or can be glued onto the bags.  I think the subdued Kraft paper surface of the bags is ideal for decorating  with a variety of images and other pretty embellishments.  I added flowers from my multi-media floral collection.  I like the woven handles that came with the bags but if you don't, they can be easily  replaced with something more colorful/fairy-like.  Although the top bag photo doesn't show how the tiny flowers in the foreground shine like jewels, in close-up they really add some texture and 'fairy dust'. 
On both bags I used labels to cover up the Hawaiian Airlines logo.  Even the backs of the bags had  small logo marks so I added tiny stickers to cover them up, too.  While these bags are not works of art, they do recycle these often thrown away free bags into a pleasing carrier for a goodie or two for a hard working hostess or friend deserving of a surprise gift. Here's hoping that you are saving our planet one recycled, decorated bag at a time.  Thank You for not adding to our landfills!


Thursday, September 12, 2024

Gift Bag with Heart Shaped Confetti Window

After making several shaker window cards, I decided it might be fun to make a confetti shaker window gift bag.  The hardest part of this bag was die cutting the heart in the bag without cutting through the bag's back.  The Spellbinders heart die set has several sizes of hearts so it was easy to find a size perfect for the bag. I positioned the die on the front of the bag and washi taped it in place.  Inside the bag, behind the die on the front, I lightly taped a piece of card stock.  I ran the bag through my Big Shot machine to cut out the heart window.  I had to add several pieces of card stock between the cutting plates to cut only through the bag and card stock behind the front.  I also put an extra piece of card stock inside the bag to protect the back of the bag.  Next I filled a small Heiko cello bag with heart confetti (so many to choose from at HM BFC) and adhered it between the bag front window and the heart window behind.  I made the mistake of taping the confetti bag where it was visible inside the bag so I had to cover it up with another piece of card stock..LOL!  At least it doesn't show the messy taping.  Finally a pretty floral print bow added a sweet touch to a unique gift bag.  I can see more confetti gift bags in my future! P.S. An added bonus is that the recipient (hopefully a crafter) can take apart the confetti bag and use the confetti on HER craft projects.  No Wasting! Recycle and Reuse! 


Sunday, September 8, 2024

Floral Confetti Window Card


In the box of card blanks with gold designs on the front, I discovered a pretty floral print that I decided would go well with one of the lady stickers from Japan.  As in the previous confetti window card, I cut the window with a Hero Arts Infinity die. (Read previous post to learn how I aligned the windows to make a pocket for the confetti.)  This time the inner panel was cut from a 6x6 floral print card stock. (See photo below.)

A small Heiko cello bag was filled with floral confetti and small Prima paper flowers (old stash) before sealing and attaching between the window layers of the card front.  After adhering the chosen sticker (her bouquet was enhanced with green and yellow color pencils), I glued three Prima paper flowers to the corner of the window.  Gold Stickles paint was added to the center of each blossom.  The second time trying a new technique always seems easier than the first.  I think that this card also is more pleasing to my eye....maybe because I like the flowers and cheerful colors. This type of card is really simple to make but it looks impressive. I think you will be pleased if you give it a try. Go on...try it!. You know you want to ...yes, you do!