Friday, January 30, 2015

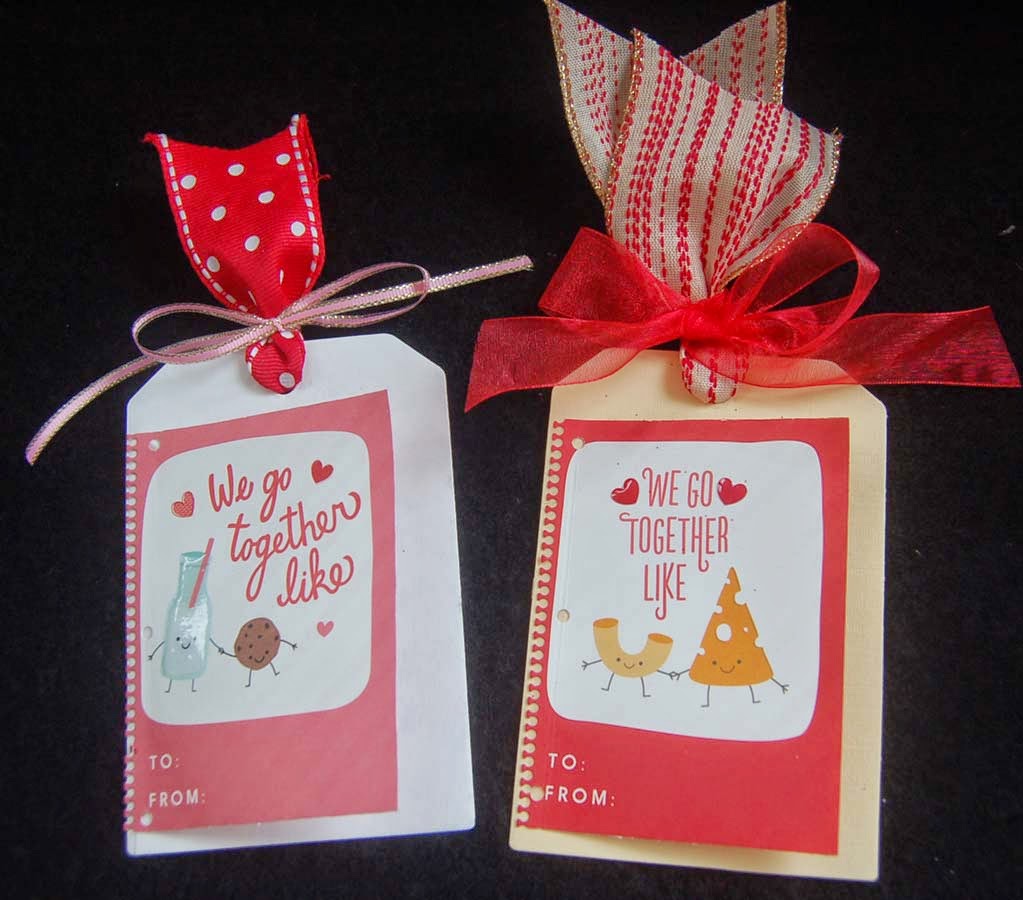
'We Go Together' Valentine Tags

This year HM Ben Franklin Crafts is selling the cutest Pebbles papers and embellishments!  I especially love the 12x12 card stock sheet that has a dozen old fashioned Valentine cards printed on it.  I cut them apart and started experimenting with the Paper Smooches border dies. I thought that one of the dies made the edge of the card look like it was ripped out of a notebook (especially after punching three holes) so I added it to a large tag (Little B die set) but only adhered the die cut edge so it could open like a spiral notebook (to reveal a Valentine message). To 'unstick' the exposed double-stick tape, I brushed it with the EK Success Powder Tool (see bottom photo) which is a cool product that lets you neatly apply a great smelling powder to make surfaces unsticky.
Here are two other Valentine gift tags that I made using the Pebbles card stock and Paper Smooches border dies. You could use decorative scissors to cut the borders if you don't have the dies.  I used double stick tape on only the sides and bottom of the die cut edges so that I could slip a gift card (perhaps McDonalds or Starbucks) or money into the pocket.
Finally, here are two more tags that are actually luggage tags (Paper Accents 3 pack).  I picked and trimmed the Valentine images that would be appropriate for a trip by air or water.  The back of the clear pocket could be used to hold a monetary gift (if you are giving this as a present) and travel ID could be attach to the back of the Valentine.
I did embellish the tags a bit with Pebbles epoxy stickers and Ranger Glossy Accents (not shown). I think the matching 12x12 card stock is cute too, and now I wish that I had used it as the tag base.  Oh well, I still have more to make and attach to some baked goods.  Thanks for stopping by. Please leave a comment if you can spare the time.  I love hearing from you!

Wednesday, January 28, 2015

Valentine Stand-Up Calendar Card

I wanted to make a stand-up Valentine card but I didn't have a die for one and didn't think I could cut one with a craft knife.  Then I had a brilliant idea to use one of the Little B heart dies from the set.  First I made a 5"x 5" card from a piece of double sided Pebbles cardstock (5"x 10"), making sure that the one way pattern was going the right way.  After folding the card front in half (2-1/2" from the bottom), I determined where I wanted the main heart and placed the heart die on the card using a magnetic platform to keep it place. (You can use washi tape if you don't have a magnetic platform but test it first to make sure it won't peel off some of the card stock). To get the die to cut only half of the heart, place the top clear cutting pad in line with the half card fold.  This placement will allow the pressure of the Big Shot to only cut the top half of the heart out.
I used the same 3-1/2" heart die to cut the arrow print card stock (Crate Paper 6x6 pad) which I taped to the half cut heart on the card base.  The Lawn Fawn elephants were stamped with Memento ink and colored with Copic pens (light grey and lavender). I cut the banner from XOXO print paper (from a Pebbles 6x6 pad) using a Paper Smooches die and stamped the LF sentiment  (came with the elephants) on it.
For more interest I added the arrow (the tip stuck down with This n That foam square cut in half) and the faceted acrylic heart.  Both of these items were in the American Crafts (kiss kiss ephemera pack), which has 94 pieces and is a real bargain.  The Vippies calendar is secured with its own double stick tape and is what helps to hold up the card front. Except for the calendars and Paper Smooches banner dies, I purchased all of these items from HM Ben Franklin Crafts.  You should check out the store soon because there are lots of fabulous new items being sold at very reasonable prices. See you there!
P.S. When I first read the sentiment I thought it said, "Love Your Tons" and I thought what a rude thing to say!  LOL!

Sunday, January 25, 2015

Dog and Cat Happy New Year Calendars

I made some calendars like these earlier but they were smaller.  Since I still had some larger 2015 calendars, I decided to use the same format but make them a larger 4x4 size.  I've had the cute dog and cat Sister Stamp sets for awhile but never inked them up.
I think they pair well with the font of the Lawn Fawn Happy New Year stamp set and the wine glass adds a festive touch.  This side view shows how simply the calendar stands were constructed. (Start with a 4x12 strip and score at 2", 3", 4' and 8".)

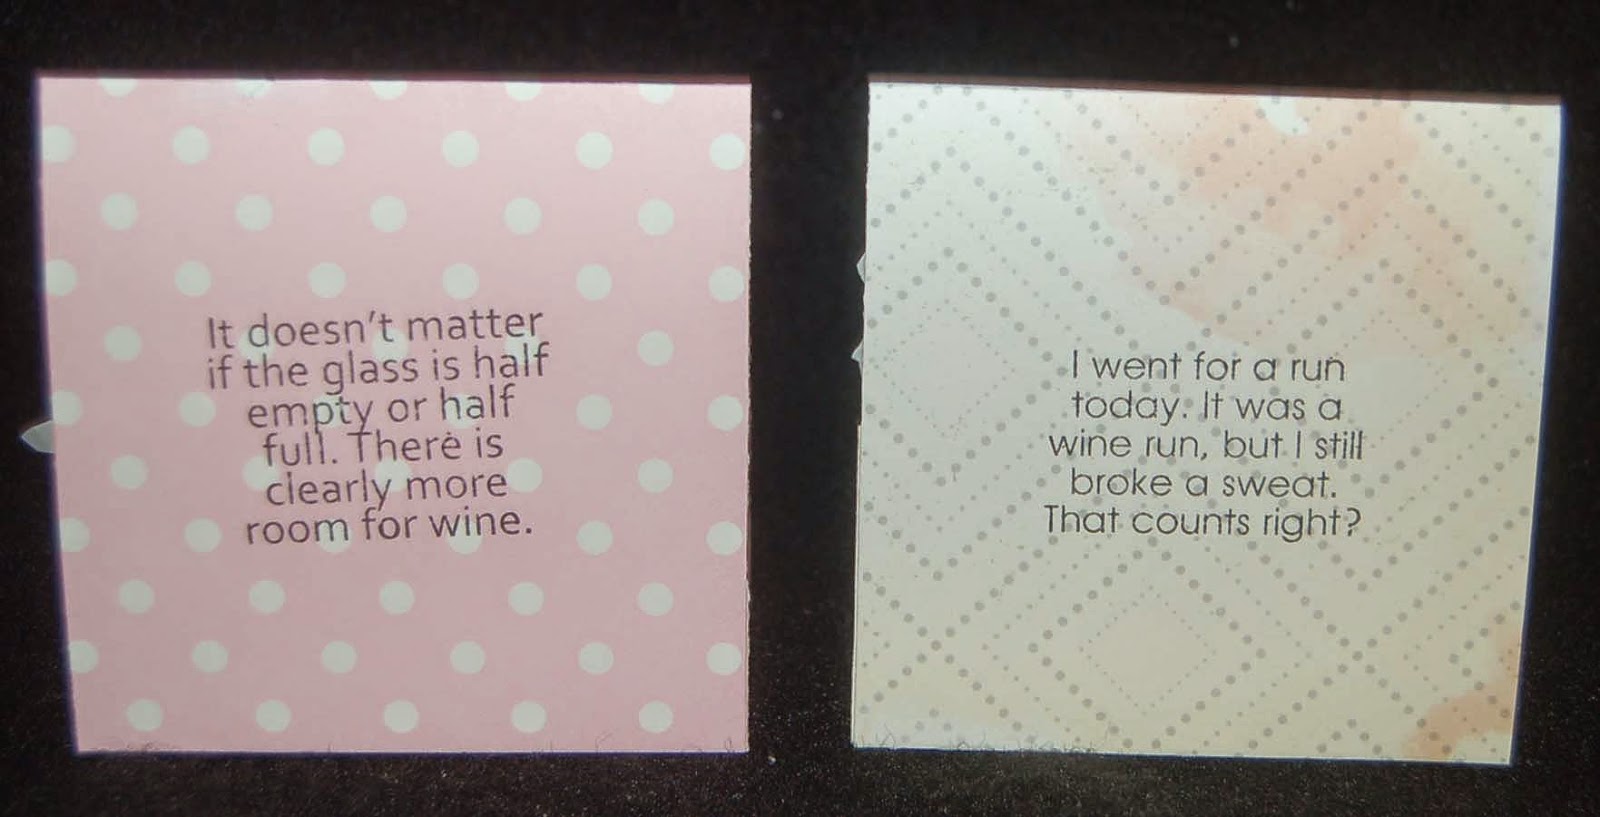
I found these Funny Bones sentiment stamps at BFC and thought they would be perfect on the back of the calendar stands.  I think the recipients will get a chuckle from them.  With Vippies calendars, some rubber stamps and a few cardstock strips you too can make some cute desktop calendars for your friends and family.  Give it a try!

Thursday, January 22, 2015

' Love You a Latte' Mini Calendar


This year I ordered too many mini calendars from Vipies so I decided to make some 'tuck ins' to add to my Valentine's Day cards. Last year I made this style of collapsible stand-up calendar and it worked very well so I decided to use the same format this year.  I start with a 3"x 8" strip of single or double sided card stock (Paper Crate) and score it to fold at 3", 6", 6-3/4", and 7-1/2".
It is simple work to fold the piece and tape (double sided Merikan) the last 1/2" flap down.  For this calendar I used an image from a Lawn Fawn stamp set and used the matching die set to cut out the cup.  Copic pens were used to color the image and sentiment.  For some color I added a thin gold edge pink Heiko ribbon and a tiny epoxy heart.
For a bit more whimsy and realism I used a dollop of pearl pen. (The photo of supplies below shows a Japanese brand pen, but Ben Franklin Crafts has a similar product.) I guess I should remove the December page before giving this calendar since it is already Jan. 2015.  Thanks for stopping by today and I hope you enjoyed your visit enough to return to this blog site many times in the new year. Have a great 2015!


Sunday, January 18, 2015

Starry Night Thank You Card

 This should have been an easily assembled shaker card but for some reason I made a lot of 'boo-boos'....just when I thought I had mastered the shaker card  ;(   Anyway, after stamping the Hero Arts background star stamp twice on a semi-glossy white cardstock with turquoise Versa Magic ink and blending the overlapped areas,  I stamped the Hero Arts 'Thank You' words over it in a dark blue ink.  Then using one of the star dies from the Little B set (love this set because it includes stitched stars) I cut a star in the stamped panel.  Next I taped on a piece of acetate (with Merikan double stick) behind the star opening.  Using the same star die I cut out an opening from a piece of thin foam and taped it behind the acetate covered star.  In hindsight I should have just cut the star from a large rectangle of foam and taping the whole thing to the panel.  Of course, I should have also NOT taped the shaker panel upside-down to the blue card blank!  However, to rectify this mistake I cut the card blank front and positioned it onto a white card blank. (I actually liked it better.) ;)  I'm sorry that the photo of the card is not clear but I think the semi-glossy cardstock had too much of a sheen.  Oh, I almost forgot to say that I filled the star window with confetti which was purchased from HM Ben Franklin Crafts (the stamps and die set came from there too).  The confetti trio package was supposed to be for New Year cards but I guess I'll use them for other crafts...shaker birthday cards? I think I'll do it right next time.  LOL!
P.S. At one point the sequin stars kept falling out so I looked for a gap in the foam but discovered that I forgot to put the acetate behind the window.  Hahaha!

Wednesday, January 14, 2015

Bear Cupcake Birthday Cards

 As soon as the Christmas season was over, I couldn't wait to ink up my new Mama Elephant cupcake stamp set.  I was so excited that I forgot that I had the matching die set and fussy cut everything ....duh!  These sets were shown in a previous post. Anyway, since I needed a birthday card, it seemed perfect to use the Doodlebug 6x6 sugar shoppe paper, matching washi tapes, and pixie embellishments
For the card bases, I used the Mama Elephant scalloped card and stitched rectangle set.  The doily was added so that the cupcake would be focused.  I made an instant pull bow (ribbon from Ben Franklin Crafts) and wrapped it around the pixie stick.  I love the pixie stick embellishments because they are a quick way to add some fun to your paper crafts and can even be used to decorate real cupcakes.  The plate for the cupcake came from a Lawn Fawn (love you latte) set.  The candle is from the Mama Elephant carnival toppers set and was colored with pink and orange Wink of Stella.  To balance off the sparkling ribbon I added Martha Stewart large iridescent glitter to the cupcake frosting.
 I forgot to take a photo of the inside of these cards so I will add it later.  The birthday saying was stamped in white ink and heat embossed with white opaque powder.  I couldn't resist adding the Doodlebug washi tape too because it adds just the right touch of color.

I feel that these cards came out well with just the right amount of cuteness to make them right for a young girl or just someone young at heart. I hope that you will visit HM Ben Franklin Crafts to see all the wonderful birthday crafting supplies.  They will surely inspire you to make a B-day card for an upcoming  occasion or one for your emergency card stash.  Thanks for visiting....hope it was a delightful stop!

Saturday, January 10, 2015

Sweet Cupcake Thank You Card


I always like to get my thank you notes out as quickly as possible.  I want my cards to have some handcrafted parts but I do take shortcuts when possible.  I started with my new Mama Elephant stamp set, 'carnival cupcakes', with matching dies. I found that if I combined it with a Lawn Fawn set, 'love you latte' (also with matching dies), I could make some sweet cupcakes.  At first I was just going to use it as the centerpiece on a scalloped edged card but then I noticed a neglected box of ready made cupcake cards with word stamps. I purchased this boxed set a long time ago but did not think that stamping the words in the empty circle would be very creative so the card set sat and got dusty.  Today I had a 'Eureka!' moment as I combined the card with my paper 'thanks' cupcakes. Inside the card I used the wooden stamp, 'So Sweet of You' and I added a little shimmer to the cupcakes with Wink of Stella (doesn't show well in the photo, but it's a subtle, lovely touch).
These cards turned out really cute and were so easy to 'bake'.  Although you probably won't find the card set in Ben Franklin Crafts anymore, I'm sure you have some suitable ready made cards to which you could add some cupcake stamped images to get the same effect that I did.  I don't think that this shortcut lessened the handmade quality of these thank you cards and the recipients will know that I really appreciated the time they took to find just the 'right' gift for me.  Hope your Christmas was a 'sweet' one.

Tuesday, January 6, 2015

Bottle Shaker Thank You Cards

 Recently, I was treated to a delicious lunch at my friend's home. I wanted to send her a special thank you card to let her know that I had a marvelous time.  Since I just purchased a set of bottle dies and a set of small cat dies, I decided to make a shaker card.  The cat is there because she has a miracle black cat who survived despite the odds against him.  It was simple work to die cut the opening, back it with acetate and use double stick tape to adhere a foam cut-out to the back (gives depth for the sequins).
Here is a close up of the card.  The butterfly is from HM Ben Franklin Crafts and the cork was cut from textured card stock. I cut a slit in the acetate to insert the cork.  The die set comes with the cork and label dies as well as several sizes of bottles.
 Here is another version of the card for my emergency stash card box.  Remember: You'll need lots of thank you cards after Xmas.  It's always just as easy to make two when you already have the supplies out. The flower sequins are pretty but tend to get stuck in the sides because they are so thin and flat so I suggest using seed beads/regular sequins.
 These die and stamp sets have so many possibilities that they make my creative juices overflow  and the gears of my brain whirl non-stop.  Hope the holiday season makes you craft crazy too! 

Friday, January 2, 2015

Super Fast Paper Plane Thank You Card

 Once I had the idea for this card it was a snap to make. No coloring was needed, just some pouncing with a dauber to apply some Versa Magic turquoise ink.  I only inked and stamped the first four words of the sentiment.
 The folded paper airplane stamp, dotted curved line, and the sentiment are from a Lawn Fawn set that I purchased at HM Ben Franklin Crafts.  The thank you stamp came from a Hero Arts set (not shown). The folded crane stamp is from a Mama Elephant set that has a matching die set.  If you do not have the sets you could fold a tiny origami crane from white paper and adhere it to the card.
I hand cut the paper plane image and fastened it and the die cut crane to the card with sticky foam squares. Voila!  In mere minutes the cards (actually four of them) were done.  The most challenging part of this thank you card was not adding extra colors or embellishments.  It's a K.I.S.S. (keep it simple sweetheart) card and I am proud of my restraint.  LOL!