Monday, April 27, 2020

Panda Gate Fold Card


 As soon as I spied this Sizzix Panda die, I didn't hesitate to put it in my shopping cart at HM Ben Franklin Crafts. It was a pretty easy card to assemble using a glue pen. Perhaps it could be made by running the papers through a Xyron machine to apply a sticky film before die cutting the pieces if you don't like working with glue. I did change two aspects of this card.  I didn't like the black circle and split back of the card so I cut two full pandas from white card stock and glued them on.  Also I cut the nose in half instead of keeping it whole on one side of the gate.
 I added a thin Heiko rainbow ribbon to tie the card closed and may add googly eyes for more cuteness.  This card was much easier to complete than I expected and I am putting it in my any occasion stash of cards. It was a 'pandastic' card making day, thankfully with no 'pandamonium'!

Saturday, April 25, 2020

S'more Brownie Birthday Cake, Please!

In February I had my ?th birthday.  My non-cooking husband volunteered to take me out to all the meals of the day and get a cake. I preferred take out food and to make my own birthday cake.  I am a bit fussy about desserts and don't like to eat calories that are not worth it.  This year I had a yearning for a s'more cake that I saw on a cooking show.  However, I didn't want to spend all the time that the baker did on TV so I opted for a brownie cake made from my favorite brownie mix, Ghiradelli Triple Chocolate.  You are probably thinking, "brownie mix?".  I assure you that I have tried a bunch of brownie recipes from scratch and none of them match up to the taste of this mix.  (I've been a home baker for 30 plus years.)  Anyway, nowadays I buy the brownie mix in bulk from Costco (six pouches in a box) because the mix can be used in a variety of ways....cranberry pistachio squares or fruitcake brownie cupcakes, etc.  For this recipe, I just baked the brownies according to the directions and then in the last few minutes I threw on some crumbled Biscotti cookies (free from the airlines since I didn't have graham crackers), chopped dark chocolate (about a bar) and a cup of mini marshmallows. Then I put the pan under the broiler until the marshmallows browned.  This s'more brownie birthday cake was scrumptious and just what I was craving. It also freezes well so I have a ziploc of brownies to indulge in whenever I feel like celebrating my birthday again. LOL!

Tuesday, April 21, 2020

Rabbits in the Garden Planting Dreams

 This card started with a ruined watercolor background. I tried to make a Versa Mark design on blended colors of Distress Oxide Ink.  It looks okay but it's not very exciting.  Anyway, since I had my Hero Arts Monthly set still out, I decided to use the fence and soil mounds dies to make a scene.  I am happy with the fence because it was cut from woodgrain paper and looks very realistic.  The soil mounds are neat because the have slots to 'plant' the vegetables.  The rabbits were colored with Copic pens, die cut and adhered with foam pop-up dots.  For the sentiment, I used the smallest Lawn Fawn square frame with stitching.  The words were from a stamp set that was in a magazine.  I love this card because it turned out better than I imagined and makes me feel optimistic.  Never lose hope in the goodness of mankind.


Friday, April 17, 2020

Egg Stealing Rabbit Card

During these troubling Corona virus days, I think humor helps to soften the fear of the unknown.  With this in mind, I looked at a set of My Monthly Hero stamps and dies that I purchased maybe a year ago from Hero Arts. (Yes, turn around and it's spring again.) The bunny image caught my eye because he looked mischievous.  I decided it would be humorous if he was stealing an egg to decorate for Easter.  While deciding on a design format I opened a bin and found some really old long cards and envelopes in pretty spring green and pink colors. The cards already had windows cut in them. (You can easily do this with a punch or die.)  After stamping the images, coloring them with Copic pens and die cutting them out, I used foam dots to adhere them to the card.  I used a Martha Stewart grass punch to cut out some tufts of grass that seem to be sprouting from the card. 
 On the inside of the card, I added more ducklings quacking at the bunny bandit.  It took me awhile to come up with the simple words for this card. At first I wasn't sure who should be talking, but then I was inspired by my grandson's first words.  We're still not sure where he learned them or why he said them often but they never failed to make us smile.  I hope that you are all safely self-quarantined and continue to craft to help relieve your stress.  Share your favorite blog sites so that we can all get more inspiration and smiles. Viral not virus Hugs!

Monday, April 13, 2020

Chocolate Rabbit Egg Card

Although it doesn't look like it, this card took quite a few steps to complete. I think it was worth the time and I have lots of time anyway as we are choosing to self quarantine as much as possible.  I started by stamping the Hero Arts background stamp on watercolor paper using the VersaCraft shades of green ink pad.  Next, I used clear embossing powder and a heat gun to set it.  Splashes of watercolors (Kuretake) were applied over the design and then the paper was allowed to dry.  In the meantime, I used the Tim Holtz dies to cut out the rabbit (from brown card stock) and bow (from sparkle pastel card stock).  The rabbit was coated with Glossy Accents and left to dry, too.

 The egg card shape was formed with the Spellbinders largest egg die.  The purple card stock was folded first and then the die was used so that the side edges remained intact.  The small Mama Elephant rabbit images were stamped, die cut and colored before attaching to the inside with foam sticky tabs next to the stamped and heat embossed sentiment.
Once the background stamped paper was dry, the large egg die was used to cut out  front and back pieces.  I cut the front piece in half before gluing it onto the purple egg card base.  The yellow gingham ribbon was glued along the middle of the egg to camouflage the side tabs and the 'chocolate rabbit' was glued to the left side of the front gate.
 Since I had extra printed watercolor paper, I cut out two egg tags, added purple card stock backs and embellished them with rabbits and decorative yarn. Tip: While working on a project I usually cut extra pieces from the leftover paper.  The next time I reach for the dies I might already have some pre-cut pieces in the package which saves me time searching for the right paper or taking out the die cutting machine.
 The card and tags were fun to make and will help to brighten a surprise spring gift for someone who may need cheering up during these stressful Corona virus quarantine days.  Be safe and stay positive!

Thursday, April 9, 2020

Recycle and Decorate Your Used Soap Dispensers

With all the extra hand washing we are doing in regards to the Covid-19 virus, you must be piling up  empty soap dispensers.  Here is my solution to this problem and it's a way to save money too.  I've always refilled my liquid soap dispensers (even the foam type) as I know that it is bad for the environment to throw them out.  I started these decorated dispensers by carefully removing the label from the used dispenser. This sticky label is adhered to a piece of card stock and cut out.  This then becomes the pattern for making a new label.  Trace the pattern onto some patterned or washi paper (lots of choices at HM Ben Franklin Crafts) and cut it out.  The dispenser still will be a bit sticky so simply adhere the 'new' label and apply a suitable decorative sticker.  I used stickers from my stash (old BFC stock) and the rabbit one which is a Heiko seal (lots of  them currently at HM Ben Franklin Crafts and our Celebrations store). Finally, I applied (with my finger) a liberal amount of LED resin on and around the label. I set the resin in about a minute using a portable LED lamp.  Both resin products are available at HM Ben Franklin Crafts.  To enhance the surface, I applied a second coating of resin and set it.  I am very pleased with how these recycled soap dispensers turned out.  They not only don't take up space in landfills, but because you can refill them from jugs of liquid soap, they are a real savings craft project.  Also, by putting only about an inch of liquid soap in the foaming dispensers, adding water and shaking , you can get the liquid to rise in the dispenser pump and produce the soapy foam.  I really hope you'll start recycling your soap dispensers.  You'll have fun and feel proud of your efforts in these troubling days. Stay safe and be healthy!

Sunday, April 5, 2020

Create Your Own Dream Card


 While pawing through my boxes of Easter crafting stuff, I spied a Stampendous wooden handled rubber stamp that had never been inked up...yup, another hoarded stamp. I think it is a spin off of an Alice in Wonderland illustration.  Even though it was not really Eastery (I guess I put in the box because it was a rabbit), my heart did a pit-pat and I hippity-hopped to ink it up. The image was too detailed for me to attempt to color or fussy cut it out, so I just stamped it on a piece of hand colored watercolor paper and heat embossed it with Hero Arts brass embossing powder (purchased at HM Ben Franklin Crafts).  I used a Tim Holtz stencil with Distress Ink and a Stampendous texture block rubber stamp with Versa Color ink to make the background paper for the rabbit with clocks image.  The background paper with the printed rabbit came from a Prima Marketing Inc. pack of  6x6 faux vintage sheets. For the sentiment, I curved the stamp on an acrylic block before inking up and heat embossing. The cog wheels were cut from metallic DCWV paper using Tim Holtz dies.  (One of the cogs looks reddish but it is actually copper colored. I wasn't able to capture the 'perfect' photo because of all the shiny parts.)  Anyway, I hope you're not hoarding toilet paper and antiseptic soap but like me, you are crafting with 'hoarded' craft supplies. LOL!

Wednesday, April 1, 2020

Easter Egg Bubbles Card


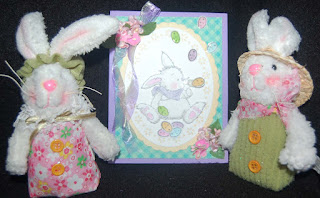
 Usually, when I obtain new stamps and dies, they sit awhile (sometimes a year) before an inspiration hits.  This time in less than a week I had a card idea. Yay me!  I used the Whimsy background stamp to make aqua plaid panel and the dies to cut the ovals....love the one with the eyelet edge!  Next the bubble blowing rabbit was stamped on marker paper with grey waterproof ink.  After sparingly coloring with Copic markers, the image was fussy cut out.  The Hero Arts (not shown) egg stamp and die were used to make the colored eggs. Only the egg 'bubbles' were given a coating of Glossy Accents (sorry, hard to see this in the photo). A ribbon and flowers were added to give the card a  springtime look.
 The plush bunnies are wondering how the bubble-blowing rabbit is able to put the Easter eggs in the bubbles. Shhh!  It's Easter magic!